Chapter 3 - Assemble and Test Your Boe-Bot
By the time you complete this section you will be able to:
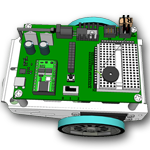
- Assemble the Boe-Bot Chasis
- Understand and use the tools needed to assemble the Boe-Bot
- Locate the correct parts for each assembly step
- Understand what servo horns are and remove them
- Mount the Servo Motors to the Chasis
- Mount the Battery Pack to the Chasis
- Mount the Wheels to the Chasis
- Attach the Board to the Chasis
- Complete the circuit assembly, connecting the servos and piezospeaker
- Test the Servos and how the wheels turn
- Use the piezoelectric speaker to generate tones
- Understand and use the FREQOUT command
- Understand and use the DEBUGIN command
- Understand what a Brownout is and how it can affect a program
- View the videos in the video section of this lesson.
- Read and follow the instructions in Robotics with the Boe-Bot Chapter 3.
- Complete the Boe-Bot activities assigned by your instructor. If self-study, do all the “Your Turn” parts for each activity in the chapter. Fill out the Observations section in this lesson for each Activity. (Note: It is only by typing in the commands that you truly begin to understand programming. So don’t short change yourself.)
- Review the Key Points or FAQs below.
- Use the Observation again to Answer the questions at the end of the chapter.
- Check your answers.
- When complete, turn in the Observations Word Doc to your instructor (print, email or other method defined by your instructor). Self-study students can optionally send to a parent, mentor or friend.
Assignments: